Difference between revisions of "Protecting panel BrainyCP from unauthorized access"
From BrainyCP
m (Protected "Protecting panel BrainyCP from unauthorized access" ([Edit=Allow only administrators] (indefinite) [Move=Allow only administrators] (indefinite))) |
|||
| (3 intermediate revisions by one other user not shown) | |||
| Line 1: | Line 1: | ||
| − | < | + | <div data-placeholder="Перевод" dir="ltr">Setting up protection of the control panel from unauthorized access is the first thing to do after installing BrainyCP (read the instructions for installing the panel via SSH). Today, developers offer two ways to improve the security of the control panel - they can be used both individually and together:</div> <div data-placeholder="Перевод" dir="ltr">1. Setting an additional password.<br/> 2. IP blocking.<br/> </div> <div data-placeholder="Перевод" dir="ltr" id="tw-target-text">In order to proceed with the configuration, log in to BrainyCP using the login and password received from the hosting provider:</div> |
| − | + | [[File:2020-12-24 15-25-10.png|border|2020-12-24 15-25-10.png]] | |
| − | |||
| − | < | ||
| − | [[File: | ||
| − | == | + | == Setting up an additional password == |
| + | <div data-placeholder="Перевод" dir="ltr" id="tw-target-text">To set an additional password, go to the control panel section "Control" / "Server settings" / "Server" tab, find the "Security" / "htpasswd authorization" block:<br/> </div> <div data-placeholder="Перевод" dir="ltr" id="tw-target-text">1.Fill in the "Login" field.<br/> 2. Fill in the "Password" field (if necessary, click on the key icon to generate a complex password).<br/> 3. Click on the "Install" button:</div> | ||
| + | [[File:2020-12-24 15-14-47.png|border|2020-12-24 15-14-47.png]] | ||
| + | <div data-placeholder="Перевод" dir="ltr" id="tw-target-text">If everything is done correctly, immediately after setting up an additional password (htpasswd), you will see an authentication pop-up window, in which you must specify your username and password.</div> <pre data-placeholder="Перевод" dir="ltr" id="tw-target-text">1. Enter the login information you just set up. | ||
| + | 2. Click on the OK button:</pre> | ||
| − | + | [[File:2020-12-24 15-24-25.png|border|2020-12-24 15-24-25.png]] | |
| + | <div data-placeholder="Перевод" dir="ltr" id="tw-target-text">In order to disable the additional password in BrainyCP, go to the control panel section "Control" / "Server settings" / "Server" tab, find the "Security" / "htpasswd authorization" block and click on the "Disable" button:</div> | ||
| + | [[File:2020-12-24 15-18-23.png|border|2020-12-24 15-18-23.png]] | ||
| − | + | == IP Blocking == | |
| − | + | <div data-placeholder="Перевод" dir="ltr">IP blocking allows you to restrict access to the control panel for specific addresses.<br/> <br/> 1. Go to the control panel section "Control" / "Server settings" / "Server" tab, find the "Security" / "Denied IPs / Allowed IPs" block:</div> <div data-placeholder="Перевод" dir="ltr">2. Add to the "Denied IP" field the addresses for which you would like to restrict access to the panel. Each IP is listed on a new line.<br/> 3. In the "Allowed IP" field, add the addresses from which access to the panel is allowed. Each IP is listed on a new line.<br/> Click on the "Apply" button.<br/> </div> <div data-placeholder="Перевод" dir="ltr" id="tw-target-text">In order to exclude an IP from the list of prohibited or allowed addresses, delete it, and then click on the "Apply" button.</div> | |
| − | + | [[File:2020-12-24 15-20-27.png|border|2020-12-24 15-20-27.png]] | |
| − | |||
| − | |||
| − | |||
| − | |||
| − | |||
| − | |||
| − | |||
| − | |||
| − | |||
| − | |||
| − | |||
| − | |||
| − | |||
| − | |||
| − | |||
| − | |||
| − | |||
| − | |||
| − | |||
| − | |||
| − | |||
| − | |||
| − | |||
| − | |||
| − | [[File:2020-12-24 15-20-27.png|border]] | ||
Latest revision as of 12:59, 26 July 2021
Setting up protection of the control panel from unauthorized access is the first thing to do after installing BrainyCP (read the instructions for installing the panel via SSH). Today, developers offer two ways to improve the security of the control panel - they can be used both individually and together:
1. Setting an additional password.
2. IP blocking.
2. IP blocking.
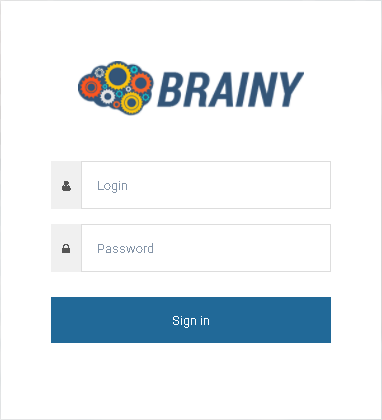
In order to proceed with the configuration, log in to BrainyCP using the login and password received from the hosting provider:
Setting up an additional password
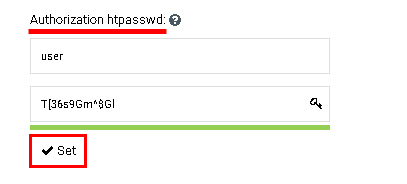
To set an additional password, go to the control panel section "Control" / "Server settings" / "Server" tab, find the "Security" / "htpasswd authorization" block:
1.Fill in the "Login" field.
2. Fill in the "Password" field (if necessary, click on the key icon to generate a complex password).
3. Click on the "Install" button:
2. Fill in the "Password" field (if necessary, click on the key icon to generate a complex password).
3. Click on the "Install" button:
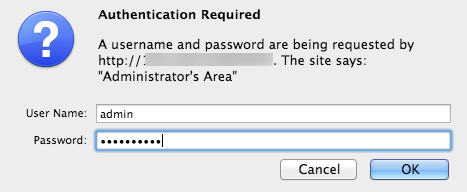
If everything is done correctly, immediately after setting up an additional password (htpasswd), you will see an authentication pop-up window, in which you must specify your username and password.
1. Enter the login information you just set up.
2. Click on the OK button:
In order to disable the additional password in BrainyCP, go to the control panel section "Control" / "Server settings" / "Server" tab, find the "Security" / "htpasswd authorization" block and click on the "Disable" button:
IP Blocking
IP blocking allows you to restrict access to the control panel for specific addresses.
1. Go to the control panel section "Control" / "Server settings" / "Server" tab, find the "Security" / "Denied IPs / Allowed IPs" block:
1. Go to the control panel section "Control" / "Server settings" / "Server" tab, find the "Security" / "Denied IPs / Allowed IPs" block:
2. Add to the "Denied IP" field the addresses for which you would like to restrict access to the panel. Each IP is listed on a new line.
3. In the "Allowed IP" field, add the addresses from which access to the panel is allowed. Each IP is listed on a new line.
Click on the "Apply" button.
3. In the "Allowed IP" field, add the addresses from which access to the panel is allowed. Each IP is listed on a new line.
Click on the "Apply" button.
In order to exclude an IP from the list of prohibited or allowed addresses, delete it, and then click on the "Apply" button.


