Difference between revisions of "CSF Firewall"
From BrainyCP
| Line 1: | Line 1: | ||
| − | + | <div data-placeholder="Перевод" dir="ltr">To configure CSF Firewall, go to the "Network" / "CSF Firewall" section of the admin panel.<br/> </div> <div data-placeholder="Перевод" dir="ltr">The "CSF Firewall" section displays information about the status and the latest version of "CSF Firewall".<br/> </div> <div data-placeholder="Перевод" dir="ltr">To enable sending emails to e-mail when entering the "CSF Firewall", use the switch in the "Send csf notifications to email" field. After activation, an e-mail input field and a "Save" button will open, which must be clicked to save the address.<br/> </div> <div data-placeholder="Перевод" dir="ltr">When you click on the "Show login, password" button, a dialog box with data for entering the CSF interface opens. <br/> </div> <div data-placeholder="Перевод" dir="ltr">In the "List of ip for entering the CSF interface" field, the list of IP addresses from which it is possible to enter the "CSF Firewall" is indicated. To confirm the IP click on the "Save" button.<br/> </div> <div data-placeholder="Перевод" dir="ltr" id="tw-target-text">To go to the "CSF Firewall" interface, click on the "Go to CSF Firewall interface" button:</div> | |
| − | + | [[File:2020-12-24 14-16-46.png|border|2020-12-24 14-16-46.png]] | |
| − | |||
| − | |||
| − | |||
| − | |||
| − | |||
| − | |||
| − | |||
| − | |||
| − | |||
| − | |||
| − | |||
| − | [[File:2020-12-24 14-16-46.png|border]] | ||
Revision as of 23:23, 8 April 2021
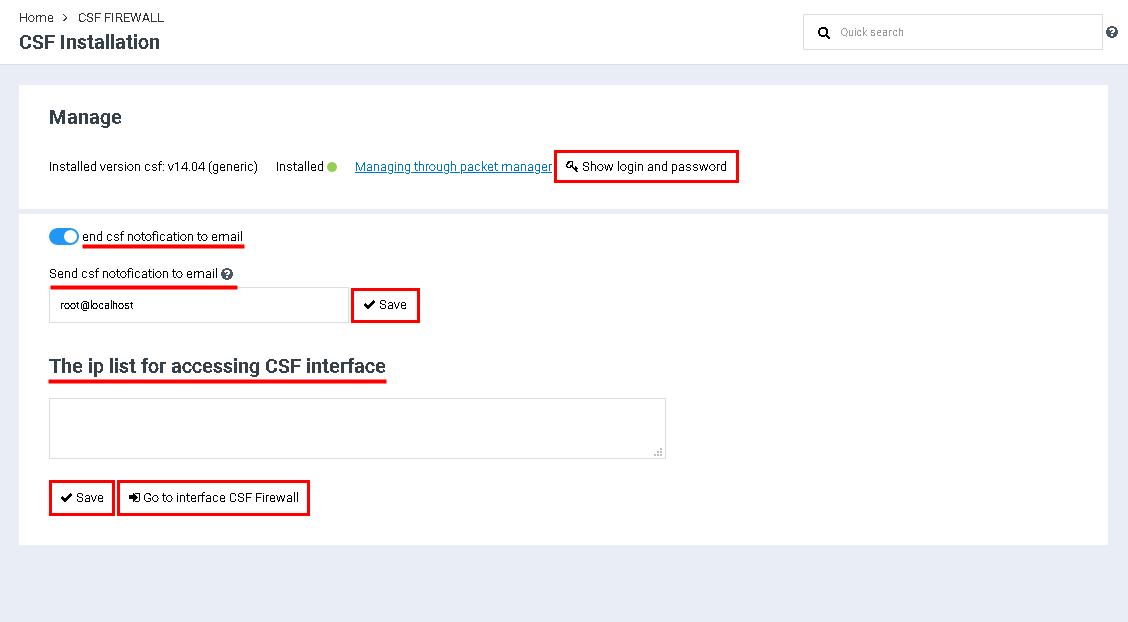
To configure CSF Firewall, go to the "Network" / "CSF Firewall" section of the admin panel.
The "CSF Firewall" section displays information about the status and the latest version of "CSF Firewall".
To enable sending emails to e-mail when entering the "CSF Firewall", use the switch in the "Send csf notifications to email" field. After activation, an e-mail input field and a "Save" button will open, which must be clicked to save the address.
When you click on the "Show login, password" button, a dialog box with data for entering the CSF interface opens.
In the "List of ip for entering the CSF interface" field, the list of IP addresses from which it is possible to enter the "CSF Firewall" is indicated. To confirm the IP click on the "Save" button.
To go to the "CSF Firewall" interface, click on the "Go to CSF Firewall interface" button:
