Create nameserver
From BrainyCP
Revision as of 12:41, 26 July 2021 by Alenka (talk | contribs) (Protected "Create nameserver" ([Edit=Allow only administrators] (indefinite) [Move=Allow only administrators] (indefinite)))
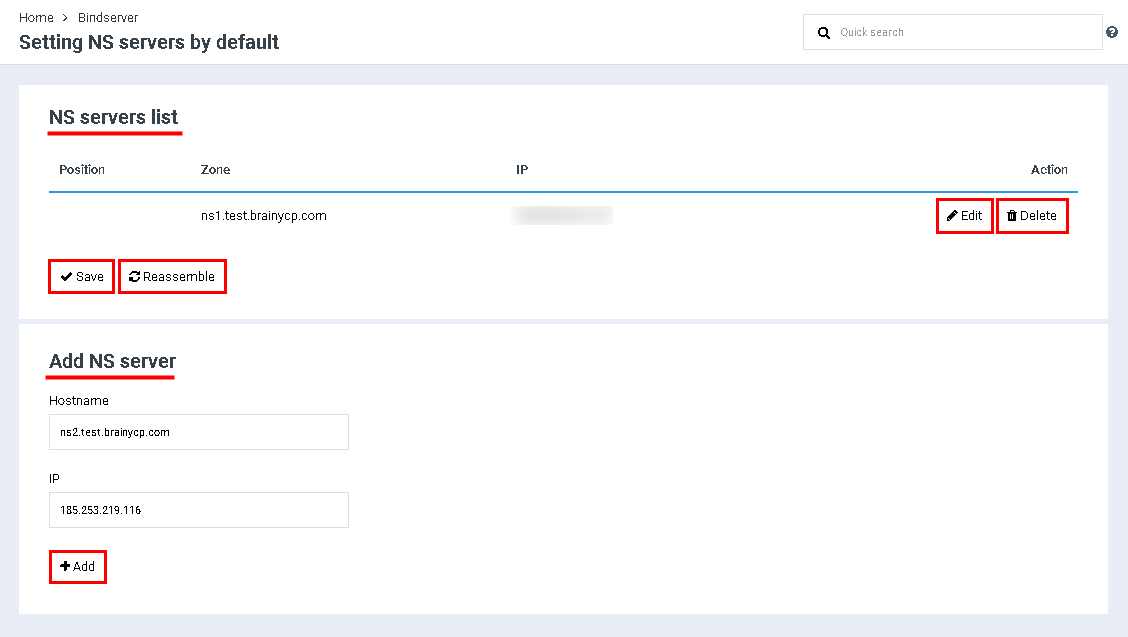
Go to the "Name Server" / "Nameservers" / "Add NS Server" section of the control panel.
The block "List of NS servers" displays a list of added nameservers. To edit the nameserver, click the "Edit" button. To delete the nameserver, click the "Delete" button.
To save the settings, click the "Save" button. To start rebuilding - click the "Reassemble" button.
To add a nameserver, follow these steps:
- Specify in the "Hostname" field the NS-server by the pattern of ns1.your-domain.
- Enter the first IP address in the IP field.
- Click on the "Add" button.
- Specify in the "Hostname" field an NS-server in the form of ns2.your-domain.
- Enter the second IP address in the IP field.
- Click on the "Add" button:
After that, you need to go to your personal account on the domain registrar's website and register CHILD NS like:
- ns1.your domain and first IP address
- ns2.your domain and second IP address
If done correctly, the NS servers you create will work on all sites that you will add in the future.
