Create mailing campaign
From BrainyCP
To create a mailing list in your BrainyCP control panel, go to the Mail / Subscriber lists section.
The "Mailing list" section consists of several tabs:
- On the "Create List of Mailing Campaign" tab, mailing lists are created and subscribers are added.
- Letters are created on the "New mail" tab.
- Mailing lists are created on the "Create list of mailing campaign" tab.
Creating the list of mailing campaign
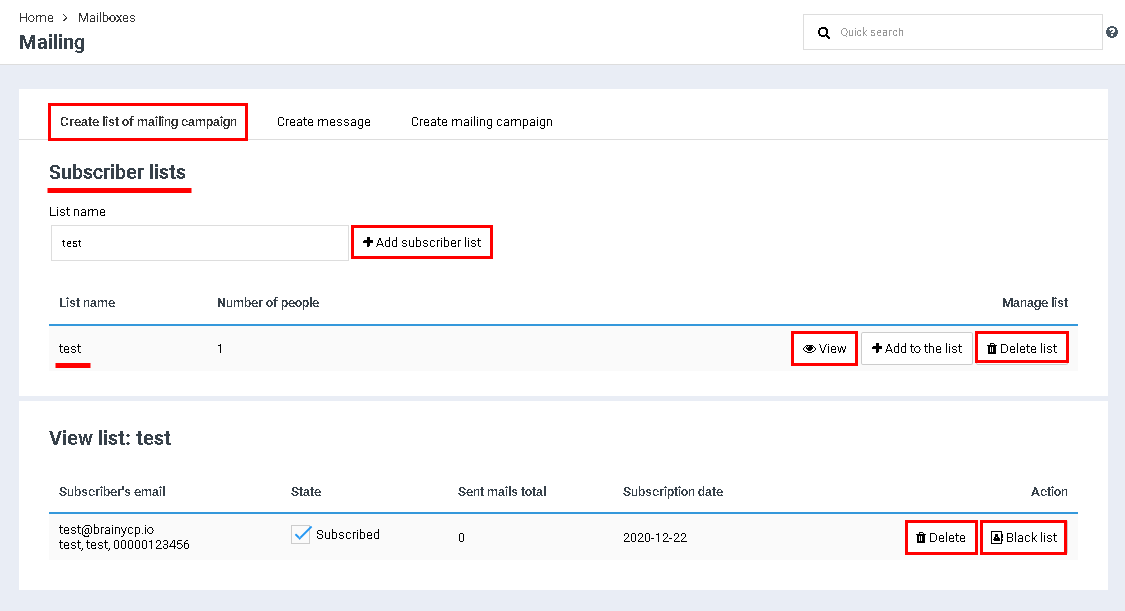
Go to the "Create list of mailing campaign" tab to create a list, point to the name of the list in the "List name" field and click on the "Add subscriber list" button, after which the added list will be displayed in the section with all lists.
To view the users in the list, click on the "View" button. As a result, the "View list" block will open. To remove a user from the list, click the "Delete" button. To add a user to the black list, click on the "Black List" button.
To delete a list, click on the "Delete list" button:
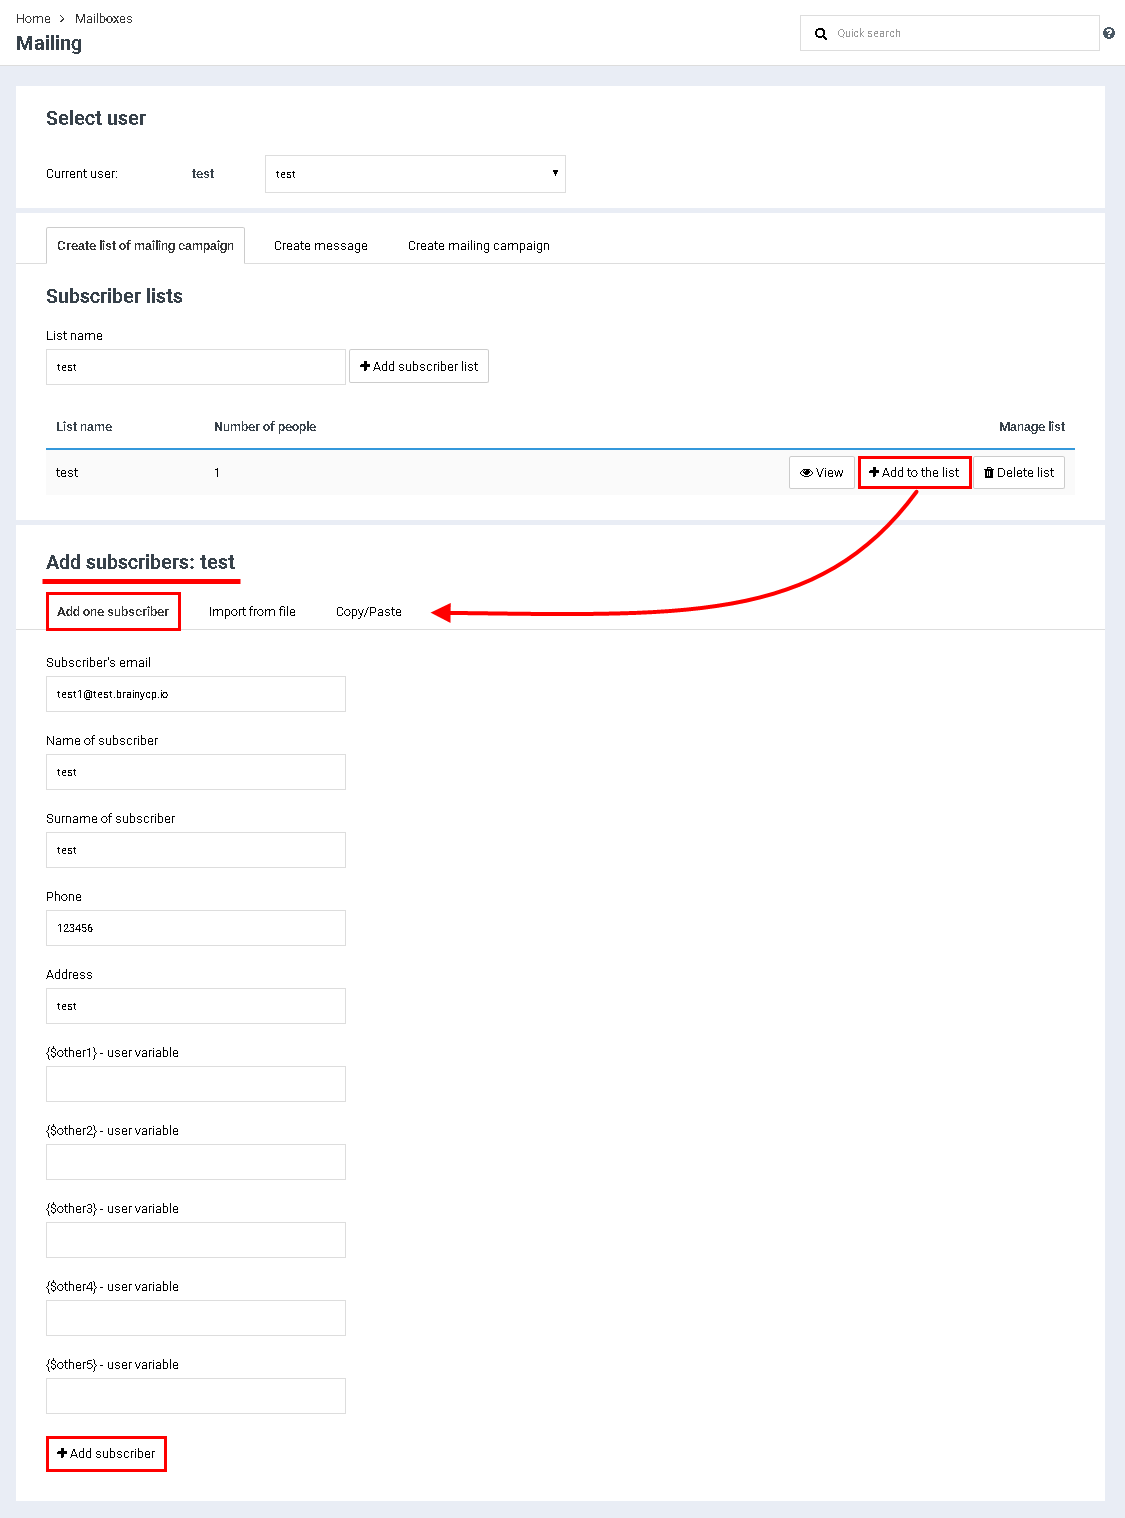
To add subscribers to the list, click on the "Add to list" button. As a result, the "Add subscribers: [name of the mailing list]" block will open, consisting of tabs:
- '"Add one subscriber'". To add a subscriber, enter his email address in the "Subscriber Email" field, and also fill in other fields to enter contact information. Click on the "Save" button to save the changes:
- "Import from file". Create a list of addresses in a .txt or .csv file and save it. To import data, click on the "Select file" button and download.
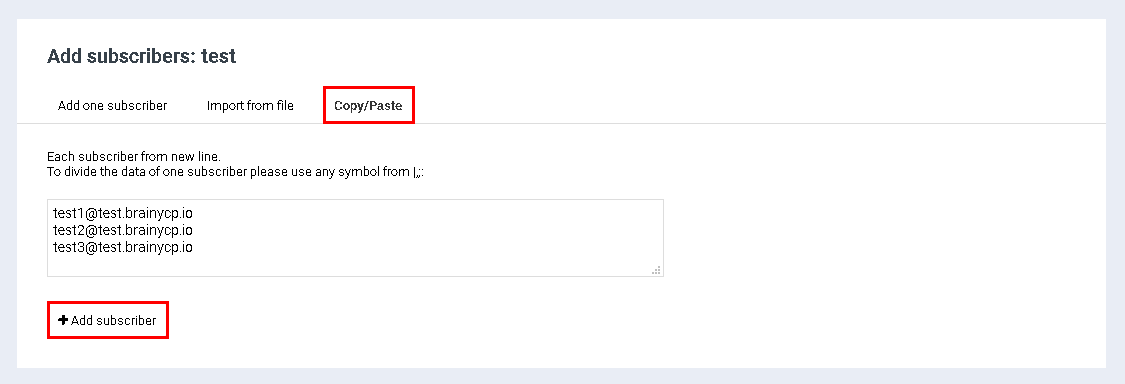
"Copy/paste". Create a list of addresses, copy them and click on the "Adding Subscribers" button:
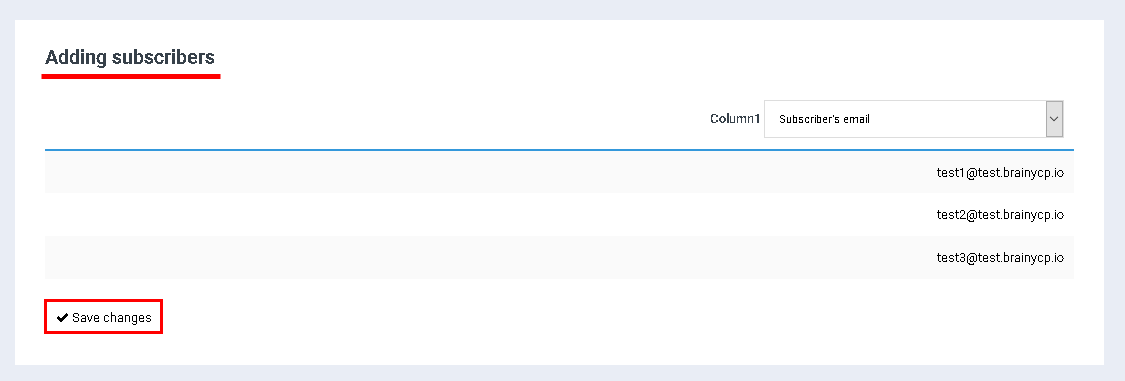
After adding subscribers in one of the three ways described above, the "Adding Subscribers" section will open, which displays a list of all subscribers. Click on the "Save" button to save the changes and see a notification about the number of added subscribers and other statistics on the results of adding subscribers to the list:
Creating mails
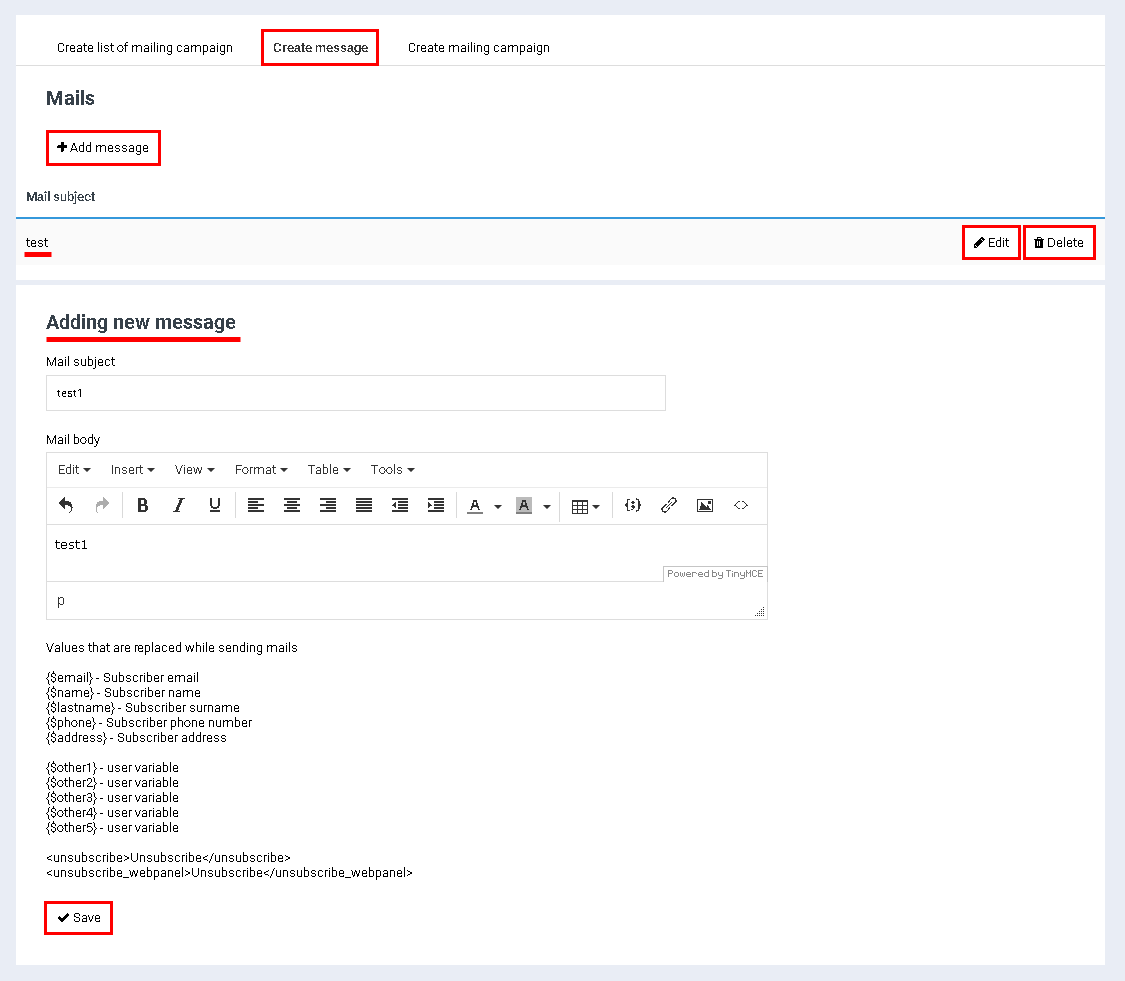
All added mails are displayed in the "Mails" block. To change the message, click on the "Edit" button. To delete the message, click on the "Delete" button.
To add a mail, click on the "Add message" button. As a result, the "Adding a new message" block will open, in which it is necessary to fill in the "Mail subject" and "Mail body" fields and click on the "Save" button:
Creating a mailing campaign
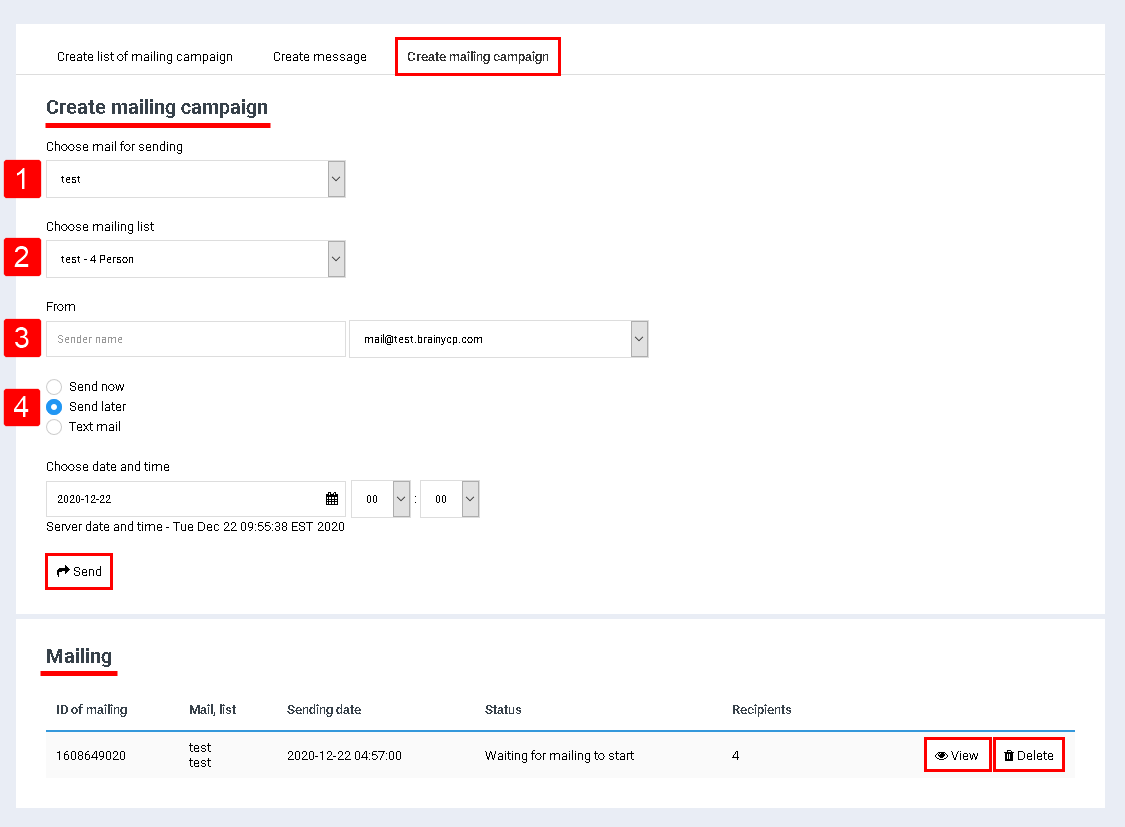
After creating a mailing list that includes a list of contacts and letters, go to the "Create mailing campaign" tab:
- In the "Choose mail for sending" field, select the mail that will be sent in the mailing campaign.
- In the "Choose mailing list" box, select the name of the mailing list that includes the email addresses to send.
- In the "From" field, specify the e-mail from which the mailing will be performed.
- Set the switch opposite one of the items:
- "Send now" – send mailing campaign now
. - "Send Later" – when this item is selected, the delayed sending settings area opens.
- "Test mail" – when you select this item, a field for entering an email address opens for testing mailing
:
- "Send now" – send mailing campaign now
Upon completion of sending in the "Mailing" section, information about the mailing will be displayed:
- Click on the "View" button to see the details of the campaign.
- Click on the "Delete" button to delete the campaign.:
