Difference between revisions of "Create mailing account"
m (Fgsfds переименовал страницу Создание почтового аккаунта в Create mailing account) |
|
(No difference)
| |
Revision as of 09:40, 14 April 2021
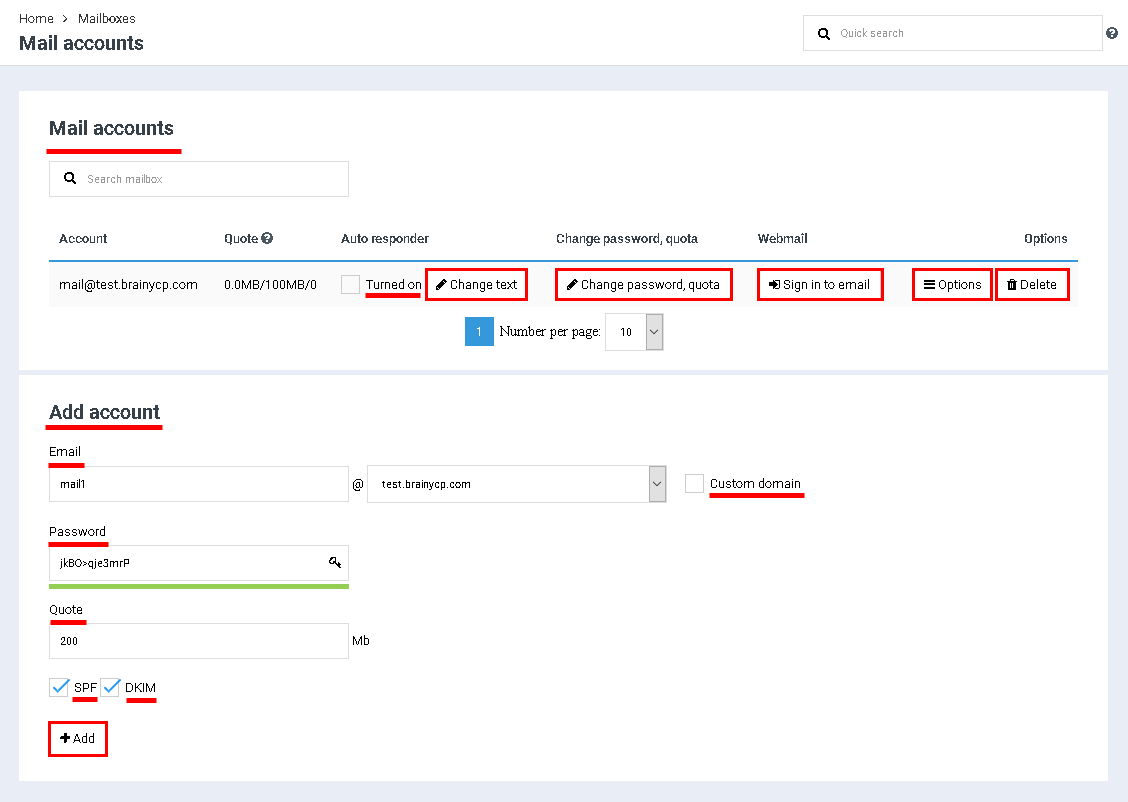
- "Auto responder". To activate the autoresponder, select the "Turned on" checkbox and click the "Change Text" button.
- "Change password, quota". Change your password and / or set a new limit on the amount of disk space for this account.
- "Log in to mailbox". Authorization in the mailbox.
- "Options". Set of options for managing the mailing account.
Contents
Adding account
- E-mail: enter your desired email address. Please note that the user's domain is automatically pulled in the field after the "@" symbol. If a user account has several domains, all of them will be available in the drop-down list. If you want to add a domain manually, check the "Custom domain" box and fill in this field.
- "Password": enter your email account password. If necessary, click on the "Generate password" button.
- "Quota": specify the quota allocated for this mail account. Later, the amount of available MB can be changed.
- To enable SPF and / or DKIM email protection standards, tick the box next to the required item.
Click on the "Add" button:
Setting up the mail forwarding
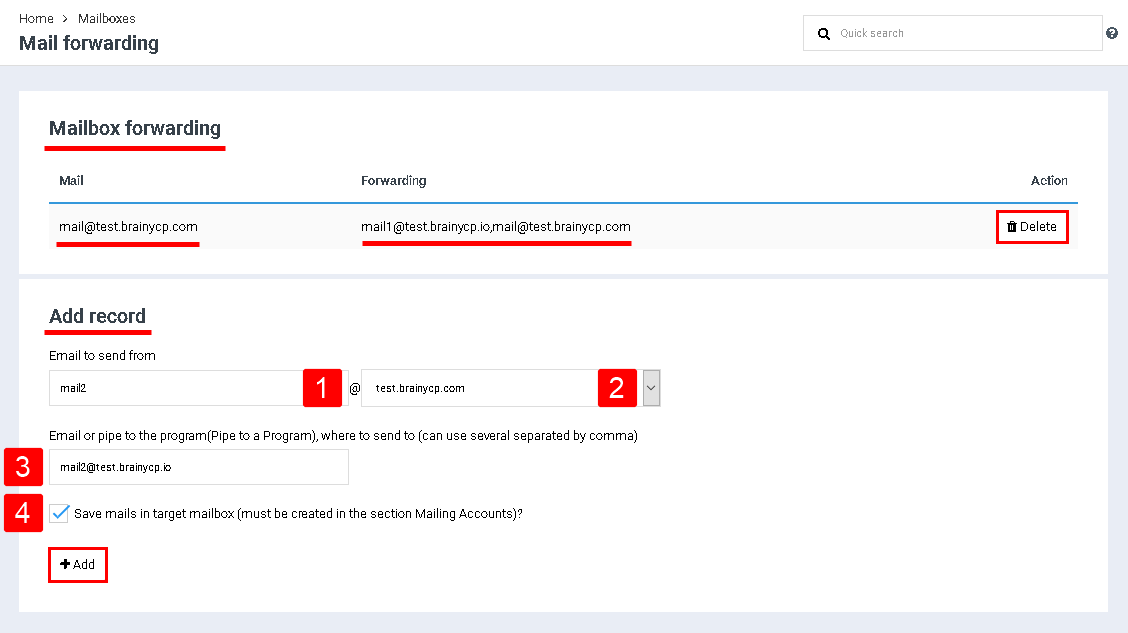
To set up mail forwarding, select "Mail forwarding" in the options. This will open the "Add Record" page.
All added entries are displayed in the box "Mailbox forwarding". To delete an entry, click on the "Delete" button.
To add forwarding, fill in the fields in the "Add record" block, specify the e-mail from which you want to redirect (1), select a domain from the drop-down list (2), specify the e-mail or pipeline to the program (Pipe to a Program), on which will be sent (3), if necessary, tick the box "Save letters in the original box?" (4). Upon completion of filling in the fields, click on the "Add" button:
"Manage SPF" and "Manage DKIM"
To enable / disable SPF and DKIM, select the "Manage SPF" / "Manage DKIM" options.
As a result, the corresponding page will open, where you can enable / disable the option:
Mail stats
To view mail statistics, select the "Mail Statistics" option.
As a result, the page "Statistics of mail sending and receiving" will be displayed. To download statistics, click on the "load statistics" button:
Add a filter
To add a message filter, select the "Add filter" option.
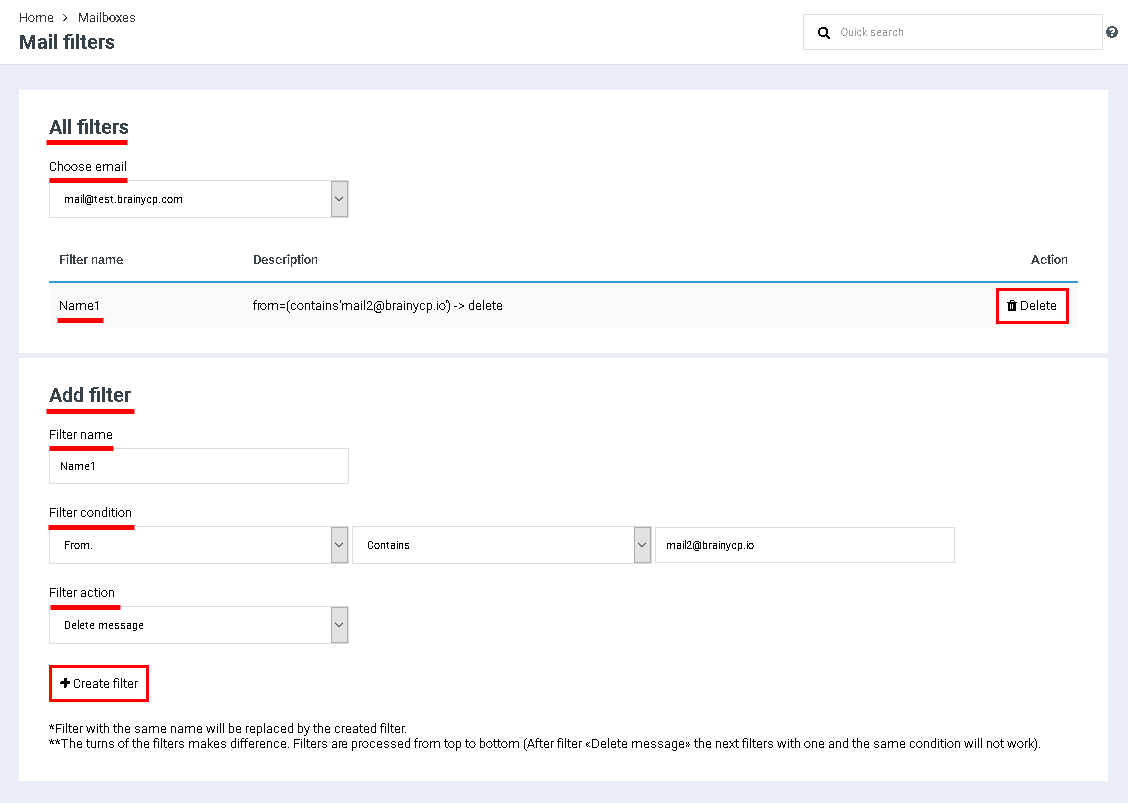
This will open the Email Filters page.
In the "All filters" block, a field for selecting an email address and a list of all added filters are displayed. To remove the filter, click the "Remove" button.
To add a filter, fill in the fields in the "Add filter" block: fill in the "Filter name" field, add a condition, select an action that will be applied to letters that match the specified condition. Click on the "Create Filter" button:


