Difference between revisions of "Mail filtering"
From BrainyCP
m (Protected "Mail filtering" ([Edit=Allow only administrators] (indefinite) [Move=Allow only administrators] (indefinite))) |
|||
| (2 intermediate revisions by one other user not shown) | |||
| Line 1: | Line 1: | ||
| − | + | ||
| + | To configure mail filters in your BrainyCP control panel, go to Mail / Mail Filtering. | ||
| + | |||
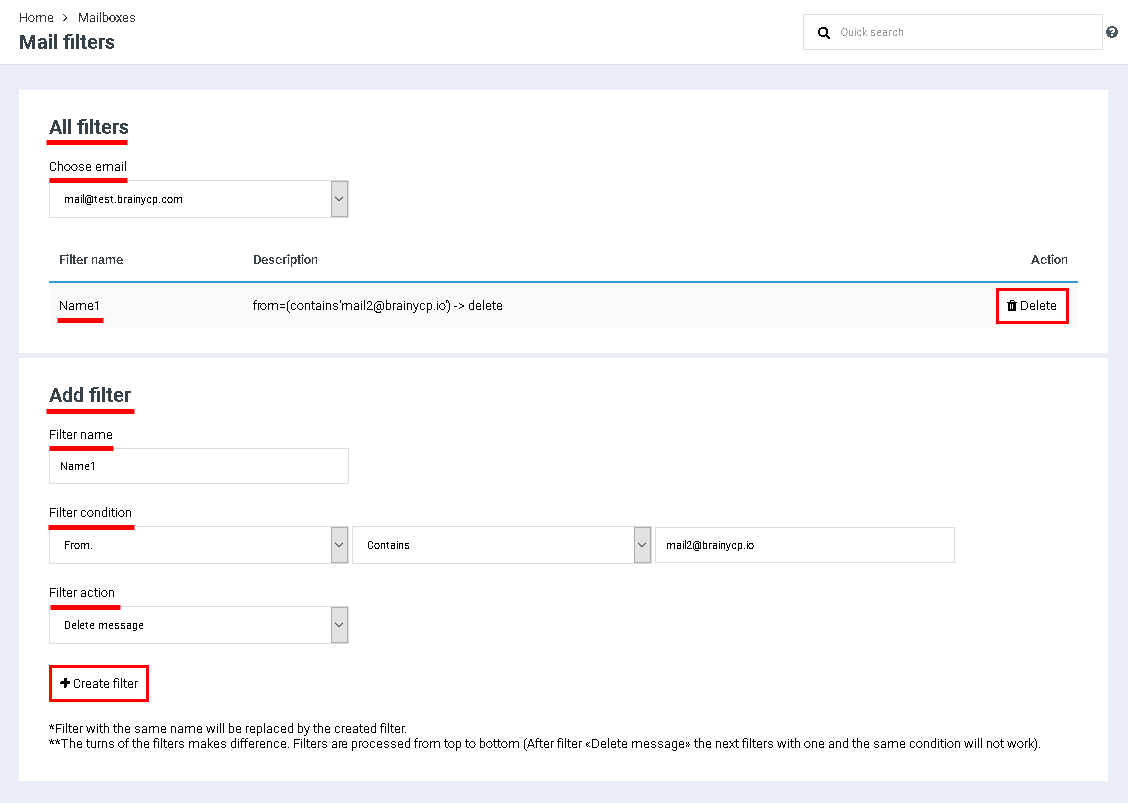
| + | This will open the "Mail Filters" page.<br/> In the "All filters" block, a field for selecting an email address and a list of all added filters are displayed. To remove the filter, click the "Delete" button.<br/> To add a filter, fill in the fields in the "Add filter" block: fill in the "Filter name" field, add a condition, select an action that will be applied to letters that match the specified condition. Click on the "Create Filter" button: | ||
| + | <p style="text-align: justify">[[File:2020-12-22 12-07-36.png|border|2020-12-22 12-07-36.png]]</p> | ||
Latest revision as of 12:21, 26 July 2021
To configure mail filters in your BrainyCP control panel, go to Mail / Mail Filtering.
This will open the "Mail Filters" page.
In the "All filters" block, a field for selecting an email address and a list of all added filters are displayed. To remove the filter, click the "Delete" button.
To add a filter, fill in the fields in the "Add filter" block: fill in the "Filter name" field, add a condition, select an action that will be applied to letters that match the specified condition. Click on the "Create Filter" button:
