Hash sums control
From BrainyCP
(Redirected from Контроль хэш сумм)
When hacked, various viruses and backdoors are loaded into the file system of the site, which change the contents of the files. In the event of a similar situation, the "Hash Sums Control" module will allow you to see exactly which files have been changed, which will allow you to solve the problem in a short time.
In order to take a snapshot of the site's file system, go to the "Security" / "Control hash sums" section of the admin panel.
Creating a snapshot
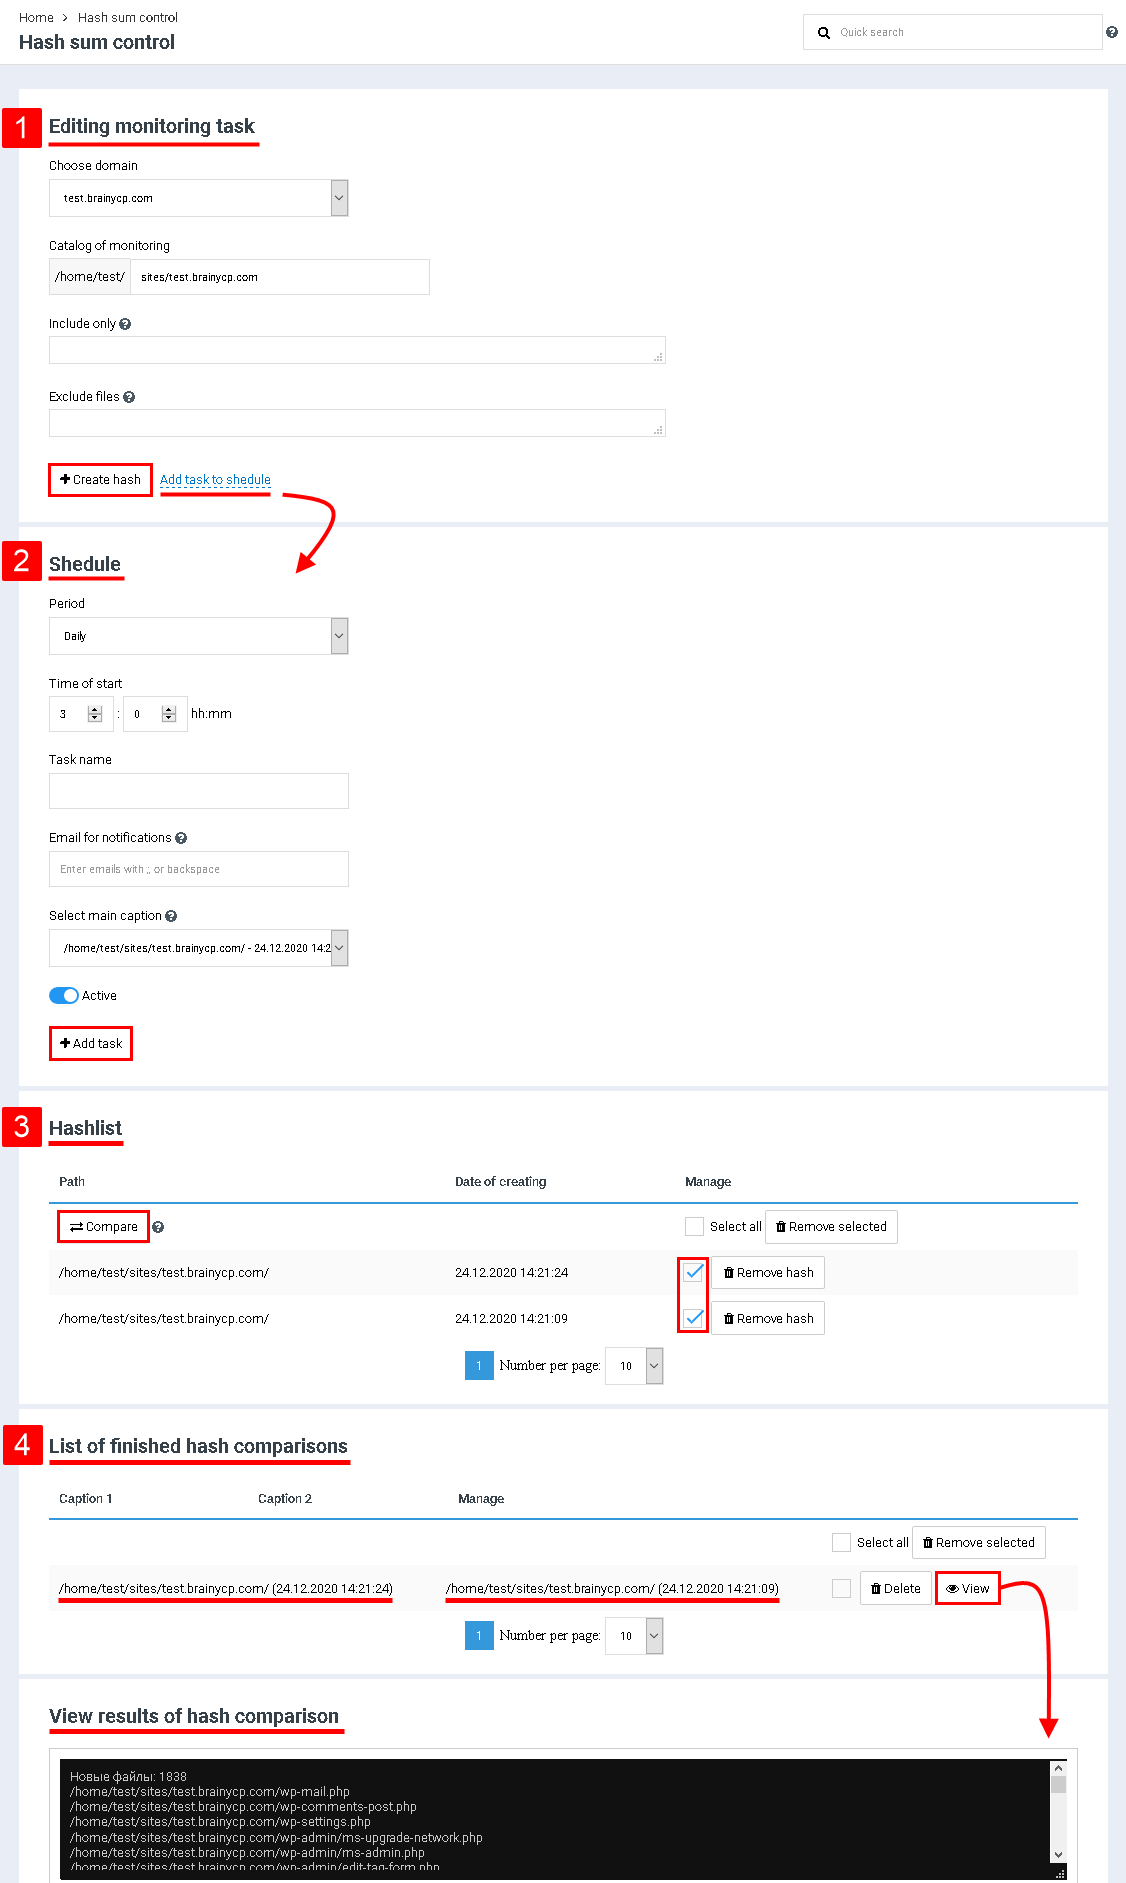
To edit the monitoring task perform the following actions (Index 1):
1. In the "Select a domain" field, select a domain name from the drop-down list.
2. In the "Directory" field, the directory address will be automatically entered after selecting a domain.
3. In the "Search only" field, you can specify what to search for: files of specific formats, folders, a directory with a search for specific extensions.
4. In the "Exclude files" field, you can specify that you do not need to search: files of specific formats, folders, a directory with a search for specific extensions.
Click on the "Create Snapshot" button.
Task in a schedule
When you click on the "Add task to schedule" button, the schedule settings window will appear (Index 2):
1. In the "Period" field, select how often the file system snapshot will be taken.
2. In the Start Time field, specify the time when the file system snapshot will be taken.
3. In the "Task Name" field, enter a name for this job. In the "Email for notifications" field, enter the email address to which the snapshot will be sent. In the Select baseline snapshot field, select a file system snapshot to compare subsequent snapshots with.
4.Set the switch to "Active" to start snapshots on a schedule.
Click on the "Add task" button.
Comparing the snapshots
Only two snapshots can be compared in the "Compare Snapshots" field (Index 3):
1. Check the boxes for comparison purposes.
2. Click on the "Compare" button.
2. Click on the "Compare" button.
To delete a snapshot, click the "Delete snapshot" or "Delete marked" button.
When the comparison is complete, in the "List of completed image comparisons" field, click the "Browse" button next to the images (Index 4):
